Project Setup for ML with UV
Setup machine learning project with uv project manager

Introduction
UV is an extremely fast Python project and package manager that has been rising in popularity—and for good reasons. I was impressed after testing it on a small project.
You can read about uv in the official website https://docs.astral.sh/uv/:
An extremely fast Python package and project manager, written in Rust.
🚀 A single tool to replace
pip,pip-tools,pipx,poetry,pyenv,twine,virtualenv, and more.⚡️ 10-100x faster than
pip.🗂️ Provides comprehensive project management, with a universal lockfile.
❇️ Runs scripts, with support for inline dependency metadata.
In this post, I will share my project setup for a Machine Learning project using uv.
Background
I have been documenting and sharing my learnings on foundational Machine Learning concepts, such as gradient descent algorithms and backpropagation (part 1, part 2, part 3, part 4). To complement this theory with hands-on practice, I’ve started a small Python project called mininn—a neural network implementation built entirely from scratch, requiring only NumPy as a dependency.
Previously, I primarily used miniconda, pip, pip-tools, pipx for ML projects and experiments. For mininn, I decided to try out uv.
There are two modes in uv for managing Python projects and its dependencies:
uv pip:A low-level, drop-in replacement for thepipcommand line interface. This mode is particularly helpful for existing projects transitioning from a pip-based workflow.uv add,uv run,uv sync, anduv lock:These are higher-level, more opinionated project APIs designed to simplify project management and improve usability.
A more detailed explanation of the differences between these two approaches can be found here. As mininn is a new project, we’ll be using the latter.
Getting Started with UV
Install uv with brew
$ brew install uvInitialize a library project
$ uv init --lib mininnNote that uv init mininn (without —lib) would generate an application project.
The above command line generates the following library project:
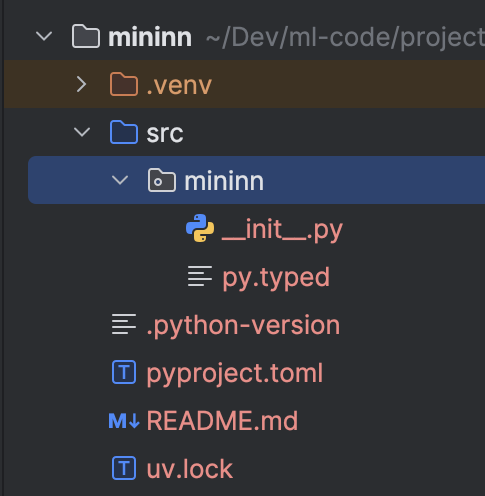
It also creates the default virtual environment named .venv and uv.lock. Every dependency you install with uv is installed to this virtual environment.
The content of pyproject.toml:

Add NumPy as a dependency
$ uv add numpyThis command handles a few things for us:
Adds an entry in
pyproject.tomlUpdates
uv.lockInstalls numpy in
.venv.
The following lines were added to pyproject.toml:

I hope you now see why this mode is considered as a higher-level project API. It handles everything for us, so there's no need to use the pip interface manually.
Test NumPy
$ uv run python

>>> import numpy
>>> numpy.__version__
'2.2.4'
uv run - runs any tool installed in the project environment with all project dependencies available.
We can see that NumPy is available.
Setting up Project Tools
For better code quality, we need to setup a few additional tools such as a linter, formatter, testing framework, static type checker. I have picked the following tools; however, please feel free to replace them with your preferred ones:
pytest - for writing small and readable tests
Ruff - an extremely fast Python linter and code formatter from the same company as uv
Pyright - static type checker for Python
pytest
$ uv add --dev pytestThis command line adds pytest to the dev dependency:

Let’s test this by adding src/mininn/hello.py:
def hello():
    return "Hello!"
Then, add a test file under tests/hello_test.py:
from mininn import hello

def test_hello():
    assert hello() == "No Hello!"
To test:
$ uv run pytest
It fails as expected. Once we fix the test above:

Ruff
$ uv add --dev ruffWe can run the Ruff Linter with:
$ uv run ruff check --fixWe use —fix to automagically fix any fixable errors. I also enabled extra rules:
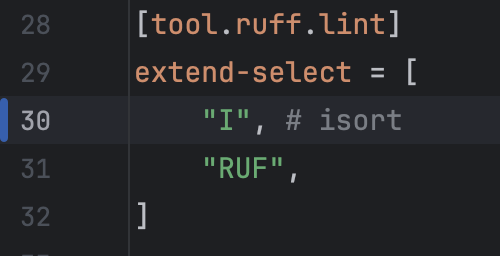
The 'I' rule enables isort, which sorts unsorted imports. I also enabled all Ruff-specific rules.
We can run the Ruff Formatter with:
$ uv ruff run formatI just used the default configuration for the formatter.
Pyright
I used type hints where appropriate. However, simply using type hints is only helpful as documentation, since the Python doesn’t enforce type checking by default. Fortunately, we can use static type checkers to ensure that our code adheres to the specified type hints. Pyright is one of the many static type checkers.
$ uv add --dev pyrightSimply check with:
$ uv run pyrightThen, it shows all type errors in our project. An example output:
src/mininn/max_pool2d.py:50:16 - error: Type "str" is not assignable to return type "int"

1 error, 0 warnings, 0 informations
Jupyter
Jupyter is a popular tool for Machine learning. There is an official document for using uv with Jupyter. The official recommended approach to start a Jupyter server is:
$ uv run --with jupyter jupyter labThe above command creates an isolated environment with all project dependencies, installs Jupyter within that environment, and then starts a Jupyter server. This will install Jupyter extremely quickly after the first try thanks to uv’s aggressive caching.
However, I just added jupyter to the dev dependency similar to all other tools:
$ uv add --dev jupyterSince this allows to drop `—with jupyter` and simply use:
$ uv run jupyter labI put all the Jupyter notebooks in the directory 'notebooks' which is adjacent to 'src':

The End
I hope you enjoyed this post. Subscribe for the next posts.